
Wiring a light switch may seem like a daunting task for some, but with the right tools and knowledge, it’s a manageable DIY project. Whether you’re replacing an old switch, installing a new one, or simply upgrading to a smart light switch, understanding the basic wiring process can save you time and money. Today, I’ll guide you through how to wire a light switch safely and effectively.
Tools and Materials You’ll Need
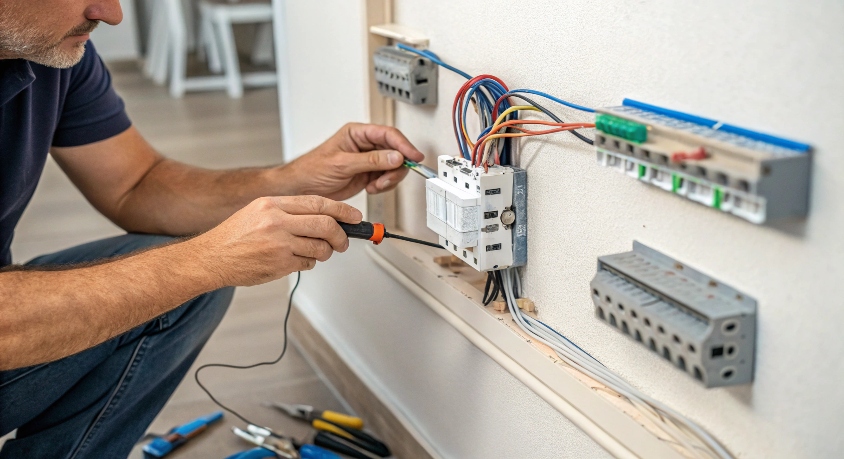
Before you begin, make sure you have the necessary tools and materials. Here's a list of what you’ll need for the job:
- New light switch (single-pole, 3-way, or dimmer depending on your needs)
- Wire stripper
- Screwdriver (flathead and Phillips)
- Electrical tape
- Voltage tester
- Needle-nose pliers
- Electrical box
- Wire (typically black, white, and ground wires)
- Wire nuts (or twist-on wire connectors)
- Safety gloves (recommended)
Having these tools ready will help ensure that you complete the job efficiently.
Step 1: Turn Off the Power
The first and most important step in any electrical project is to turn off the power at the circuit breaker. Locate the breaker that controls the circuit you’re working on and switch it off. Always use a voltage tester to double-check that the switch is no longer receiving power. This step will prevent any accidental shocks while you’re working.
Step 2: Remove the Existing Switch
If you’re replacing an old switch, begin by removing the cover plate using a screwdriver. Once the plate is off, unscrew the screws securing the switch to the electrical box. Carefully pull the switch out of the box, exposing the wires connected to it.
Take note of how the wires are connected to the old switch. Typically, you’ll see three wires attached: a black (hot) wire, a white (neutral) wire, and a green or bare copper (ground) wire. If you’re unsure, make sure to take a photo for reference. It’s essential to properly identify each wire to ensure they’re connected correctly on the new switch.
Step 3: Disconnect the Wires
Using your screwdriver, carefully loosen the screws on the side of the switch to disconnect the wires. In most cases, the black (hot) wire will be connected to the top screw, the white (neutral) wire will be connected to the bottom, and the ground wire will be attached to the green screw.
After disconnecting the wires, you’ll be ready to wire the new switch. If you’re working with a new electrical box, be sure to securely mount it to the wall before continuing.
Step 4: Prepare the Wires
Before connecting the wires to the new switch, it’s important to prepare them. Use your wire stripper to strip about ¾ inch of insulation off each wire. This exposes the copper core, allowing the wire to make a solid connection with the switch terminals.
Once the wires are prepped, make sure they are in good condition. If any wires appear frayed or damaged, they should be replaced before proceeding.
Step 5: Connect the Wires to the New Switch
Now it’s time to connect the wires to the new light switch. First, attach the ground wire (bare copper or green) to the green grounding screw on the switch. Secure it tightly with a screwdriver.
Next, attach the black (hot) wire to the brass screw on the switch. If you’re installing a standard single-pole switch, this is the only wire that should be attached to the brass screw. Tighten the screw securely to ensure a firm connection.
If you’re replacing a 3-way switch, there will be additional wires and screws to connect. A 3-way switch allows you to control the same light from two different locations, so make sure to follow the instructions provided with your switch for proper wiring.
Finally, connect the white (neutral) wire to the silver screw if your switch has one. In some cases, the neutral wire may not be attached to the switch itself but instead to the light fixture, so check the wiring diagram if necessary.
Step 6: Secure the Switch and Cover Plate
Once the wires are securely connected, carefully tuck them back into the electrical box. Be sure that no wires are exposed and that everything is neatly arranged to avoid interference when securing the switch.
Next, screw the switch into the electrical box, making sure it’s aligned properly. Once the switch is securely in place, attach the cover plate using your screwdriver.
Step 7: Turn the Power Back On
After everything is securely installed, go back to the circuit breaker and switch the power back on. Test your new light switch to ensure it’s working properly. If everything is wired correctly, your light should turn on and off as expected.
Final Tips and Safety Precautions
Double-check your connections: Before turning the power back on, double-check that all wires are connected properly to avoid short circuits.
Always follow safety guidelines: If you feel unsure about any part of the process, consider consulting a licensed electrician. Electrical work can be dangerous if not done properly.
Use a multimeter: If you’re unsure about which wires are hot or neutral, use a multimeter to test the voltage.
Wiring a light switch is a relatively straightforward task that can be accomplished with the right tools and precautions. By following these steps and adhering to safety guidelines, you’ll be able to wire your light switch successfully and confidently. Whether you’re replacing an old switch or installing a new one, the process is a valuable DIY skill that can improve your home’s functionality and comfort.
Disclaimer: Mention of any brand or trademark is for identification only and does not imply partnership or endorsement